Search This Blog

Saturday, October 17, 2015

Polishing the shaft

If one looks at the inside of a brand new TetherSpout through a magnifier, while shining a light from the other end, a lack of polish, including significant mill marks, is readily visible:

That is actually rather common in such small bores, and even my Male Chastity Now and Mature Metal chastity devices exhibit a lack of smoothness inside their locking sleeves. Industrial polishing of stainless steel objects is typically performed by a tumbling process with a mix of agitation media and fine abrasive, for instance ceramic beads and polishing paste. This works great on outside surfaces, but does hardly anything for bores that are too small to admit enough agitation media.
The lesser finish of inside surfaces is often a non-issue anyway. For instance, the above-mentioned locking sleeves are rarely exposed to a harsh environment, and ultra smooth metal-on-metal sliding is not an important characteristic. However, when a TetherSpout is used in a chastity system, it may stay in place in the wet urethra for many days or weeks at a time. In that context, the mill marks visible above could create a bacteria-friendly environment, as well as promote instances of pitting corrosion.

After noticing dark residue when wiping the inside of a TetherSpout during a cleanup following multiple days of wear, I decided to get rid of those mill marks and, if possible, polish the bore to a mirror finish. After looking high and low for ready-made and small enough bore smoothing tools and having no success, I came up with the following idea...

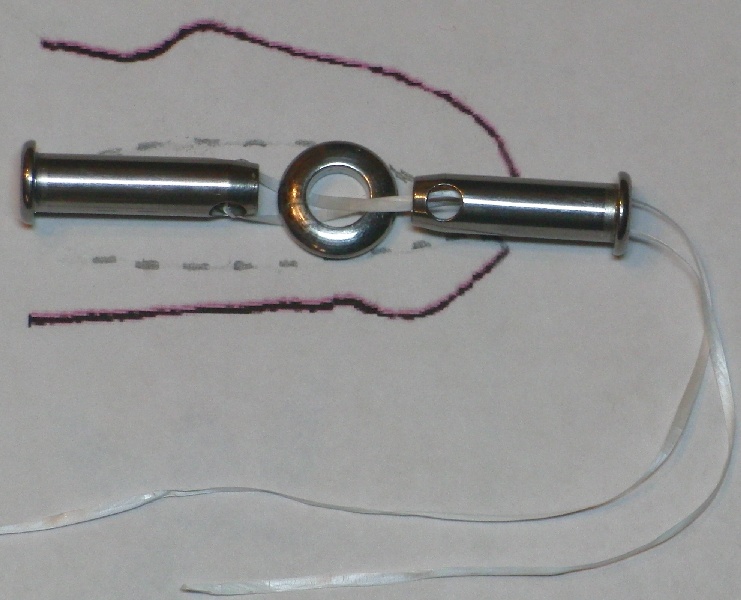
I use a 3/32" diameter, 2" long, cotter pin and squish the end loop in a small vise (while holding the body in a pair of pliers to prevent it from opening up too much) so the pin can fit through the spout's bore (and through the cross holes to be able to polish those as well). Here is a before-and-after picture of the cotter pin:
Then, I cut small strips of sandpaper, 1.5" by 3/4", that I pinch in the cotter pin like so:
And I squeeze the two ends of the cotter pin and place them into the 3/32" collet of a handheld rotary tool, to create a one-sided "flapper":
The tool in the above photo is a Dremel 4000, but the first time I tried this approach, I used a very cheap rotary tool I had bought at Harbor Freight Tools and it did the job just fine.

Turning the spindle by hand, I wrap the sandpaper tightly around the cotter pin, so I can slide the TetherSpout over it:

Then, while holding the spout between thumb and index finger, I turn the rotary tool on and I slowly move the spout back and forth (letting it also slightly rotate now and then to even out abrasive pressure), keeping all parts of it over the length of sand paper. My Dremel has a variable speed, and I usually select 10000 RPM. That performs the work quickly enough without the spout becoming uncomfortably warm. The cheaper rotary tool I used before had a top speed of 16000 RPM, but it did not go anywhere that fast under load.

A couple of points worth noting:
  • Never let go of the spout while the spindle is rotating! If you did, the assembly would immediately become unbalanced and the mass of the wobbling spout would bend the cotter pin, causing the spout to be ejected and become a projectile faster than you can say your favorite expletive!
  • I avoid letting the spout ride over the tip of the cotter pin while it is rotating. This could cause extra scratches inside the spout. I only slide the spout off when the spindle is fully or almost stopped.
  • This process creates some fine steel and abrasive grime that sticks to the fingers holding the spout. Unless you have suitable hand cleaner (such as the "Fast Orange" product commonly used by mechanics), I would recommend wearing a thin disposable glove.
  • When the sandpaper eventually gets fouled by steel dust, I remove the spout and get some of the grime off  the sandpaper by lightly slapping it. When it is really worn out, I remove the cotter pin from the collet. If I haven't already done so, I get another run with that piece of sandpaper by turning it around and pinching the worn side in the cotter pin, allowing use of the side that was previously wrapped-over and is still in good shape.
  • I do an equal number of passes with the spout placed on the spindle in one direction and the other (e.g. sliding the spout on flange first, as in the above picture, and doing the next pass with the spout reversed, that is, with its tapered end on the collet side).
  • Between passes, I blow into the spout to get rid of remaining dust.
I start with 220 grit sandpaper and only switch to a finer grit once I have removed all the visible grooves from the spout's bore.
I select sandpaper that has as flexible a backing as possible, so it can be wound tightly without cracking (for the 220 grit, I found 3M brand sandpaper at Home Depot with a plastic film backing that is extremely flexible).
Also, each time I am about to switch to finer grit, I do a pass inside the cross holes at the tapered end of the spout to polish them as well (they don't need anywhere as much work as the main bore).

In the case of the spout pictured in this post, here is what it looked like after wearing out two strips of 220 grit:
The majority of the mill marks were gone, but there were a few deeper grooves remaining. A couple more strips of 220 grit got me to that point:
And finally, having used up 6 of my little 220 grit strips, I was ready to switch to a finer sandpaper as all the grooves were gone:

Now, for the finishing, I used successively one strip each of 400, 800, and finally 2000 grit sandpaper, to get this result:
 

When I have reached that point, I can't really see any defects, but for the sake of perfection, I use a finishing kit with a buffing paste rated at 8000 grit, that I bought at a hobby shop:
The included felt pipe brushes fit just fine inside the spout and can be held in the rotary tool's 3/32" collet.

Finally, I wash the spout thoroughly. To remove any grime and buffing paste remnants, I pass a Q-tip through the bore (I remove some cotton from the end I push in so it can fit). Then I blow through the spout and rinse it some more, inspecting it to make sure no cotton strands were left inside.

And that's it, my new shiny TetherSpout is ready for use!


Saturday, September 19, 2015

Hooking up

It is, of course, not enough to just install a TetherSpout inside one's penis to prevent pull-out.The spout needs to somehow be secured to the cage...

The first approach I have experimented with consists of securing the spout via a hook made of solid, if relatively thin, wire that is also securely attached to the cage when it is locked. An example of that was pictured at the end of the Introduction post in this blog.

I bent stainless steel wire (1/16" diameter, 316 grade) in the shape below, whereby:
  • It slides over the cage's locking sleeve, behind the lock hole and thus cannot be removed once the padlock is in place
  • It is shaped to follow the shape of the top of the cage, thus making it inconspicuous
  • It passes over the top front bar of the cage, providing unyielding resistance to retraction
  • Both ends of the wire hook into the tip of the spout by passing through the top cross hole, bending back out inside the spout, and ending pretty much flush with the spout tip
  • The hook enters the spout hole at a shallow enough angle to allow a vinyl cap attached to the wire pair to slide over the spout, or slide back out to uncover it.
Here it is shown placed on the cage part of my Male Chastity Now "Contender" and hooked into a TetherSpout, but without any vinyl cap, for better visibility:

When locking up my precious bits, I typically put the testes ring (aka "base ring"), if any, in place first. I then install the TetherSpout as explained in my Installation post on this blog. At the end of that procedure, I temporarily keep the floss threaded through the spout tip, as it helps with the next step.
I present the cage in front of my penis and pass the floss through the rear of the cage and into the front opening where the spout is intended to come through. I then slide the cage on, without locking it yet. I pull lightly on the floss to orient the spout as desired and place the locking wire's hook into the top cross hole. Then, I rotate the hook into the spout so the wire pair comes to lie atop the cage, I pull it forward enough so the rear lines up in front of the locking sleeve and I slide it back over it. Padlocking the cage locks the wire in (at this point, I discard the floss).

I added a vinyl cap to the above system after my first experiments because:
  • I had observed deferred leakage of a small amount of residual urine
  • I was concerned about the possibility of impurities, such as lint, eventually finding their way up into my urethra
  • The weather where I live can be very dry at times (below 10% relative humidity) and I though exposure to that wouldn't be good for the delicate urethra wall
  • I like to go in the pool, sometimes while locked.
When purchased, the spouts come with one vinyl cap each. I drilled two tiny adjacent holes into the side of one cap, allowing the hook wires to squeeze through, and voila:
When I am ready to urinate, I slide the cap back off the spout and along the wire until it is out of the way. A bit of toilet paper is often handy to counteract the slipperiness of the vinyl. Once done with bodily functions, I slide the cap along the wires so it presents itself at an angle in front of  the spout. I press on the cap's tip, and it snaps back on.
There is a picture, a bit further down, that shows the cap in urination position...

The above-described locking wire is the latest version in a series of experiments with that approach. It is easier to install than its predecessors, but it has one potential drawback: it requires that the cage be secured with a padlock. If one's cage uses a security screw that has a low profile, this type of wire will not be properly held to the cage. The previous versions of locking wires that I had made (to fit a Mature Metal "Watchful Mistress") pass fully over the cage's locking sleeve and come to rest under the base ring's locking post. Thus, regardless of the cage's locking mechanism, the wire cannot be removed when the cage is locked.
Here are two such configurations:
The top one was my first prototype. It had a tendency to interfere with the padlock, so I made the bottom one with a wider shape in the place where it passes under the padlock. Although not really noticeable on the pictures, those wide sides are slightly curved downwards, to somewhat follow the shape of the cage's back ring and thus clear space for the padlock's body.
While we're at it, here's another picture of that wire that also shows it entering the side of the vinyl cap:
Here it is installed on the Watchful Mistress:
And here is another picture that shows the vinyl cap lifted up into urination position:

I stated earlier that this wire was not as easy to install as the one I showed first (on the "Contender"), and the reason for that may not be immediately obvious... The problem is that when it is swung into position, it requires applying a bit of force to make it pass over the locking sleeve, as it catches the top back of it. This can be mitigated by making the wire a bit longer, but doing so causes it to be fairly loose, as it can then slide back and forth quite a bit between the front of the base ring and the back of the cage. That isn't a problem with tight enough underwear but otherwise, it can look a bit sloppy.

To conclude this show-and-tell about my experiments with locking wires, here is a picture of my first prototype, made for a HolyTrainer v2:
This one was made of 14 gauge electrical copper wire. That wire is a bit thicker than 1/16" but two wire end would still pass side by side in the TetherSpout cross holes. I hadn't  thought about doing it that way at the time,and soldering the copper was easy enough (by comparison, welding thin steel wire without destroying it is still quite challenging for me), so the hook is made of a single wire end.
Here's what it looked like when locked onto the Holy Trainer:
Note that there isn't enough space at the tip of that cage to fit the vinyl cap.

I would actually recommend that anyone trying their hand at making locking wires use this kind of copper wire first. It is easy to come by (in the USA at least), reasonably sturdy yet much easier to bend, snip, and file than steel. That said, for long term use (stretches of more than a couple of days), you should definitely go with stainless steel.

A final note, about urine flow:
the ends of the locking wires located inside the spout do not cause as much of an obstruction as one would think, and the flow of urine is not impeded. However, some urine does get diverted through the bottom hole. It is not a violent jet (at least for me), but I wouldn't advise using a urinal with this setup.
I am working on a design that, among other virtues, solves that particular problem. But that will be the subject of another post...

Sunday, September 13, 2015

En Français

Français:
Ceci est juste un article très court pour annoncer le blog « Chasteté masculine ancrée » dans lequel seront postées les traductions françaises des articles de Tethered Chastity.

English:
This is just a very short post to announce the blog "Chasteté masculine ancrée" which will carry french translations of the Tethered Chastity posts.

Friday, September 4, 2015

Size matters

When using a TetherSpout, getting the proper size retainer is essential.

The retainer must be small enough to be reasonably easy to install/remove, and it must be big enough to reliably anchor itself behind the inelastic ring of urethral tissue. If the retainer is too small, its rounded outer edge may be the only part that contacts the urethral wall. This would tend to push the surrounding tissue outward and possibly cause unintended stretching. The right size retainer, on the other hand, will have contact with the urethral wall on its flat part, so a pulling force on the spout will be resisted axially, without exerting undue radial forces.

To precisely figure out the size of your inner ring, you will have to probe it with a "urethral sound". Basically, this is a precisely sized rod that you insert into the tip of the penis to feel which size fits and which does not. "Sounding" is something that people also practice for the sheer feeling of it and not only for measuring purposes. To that effect, you can find sounding kits that feature multiple sound diameters, generally in steps of 1 millimeter. This is actually too coarse a stepping for our purposes here, because retainers are sized in units of 1/3 millimeters.

The unit used for retainers is called "French" (abbreviated "Fr"). It is used in the medical field for catheters and is convenient in that context because it also relates to the size of the incision needed to insert a catheter (you can read more about it in the Wikipedia article on the French catheter scale).

For measuring yourself, I recommend you order a "Sizing Sound/Dilator" from Tether Products. These are graduated directly in Fr units and are stepped smoothly along their length to make measurement easy and comfortable: you just insert the sound until you meet unyielding resistance. At that point, the last diameter inserted is your measurement.

Here are the two Sounds/dilators that are available from Tether Products. The metal part of each sound/dilator is about 6 1/2 inches long:
To figure out which sound/dilator is best for you, try this: measure the vertical length of your slit while flaccid and without stretching it (the outside is elastic, unlike the inelastic part further inside). If it is at least 14mm (0.55") in length, get the 26-36 sound. Otherwise, get the thinner 20-30 sound. The penny in the above picture is located next to the 26 Fr step on the thinner sound. That is the same diameter as the first step on the thicker sound.

This 26 Fr diameter is a significant one: it corresponds to the smallest retainer available. Note also that the spout flange itself will require 25.5 Fr to get in. If your size is 27 Fr or above, you may want to use a retainer that is one Fr unit smaller than your measurement, to make insertion/removal easier. If your measurement is less than 26 fr, you will need to stretch your opening (the smooth steps in the sound/dilator will help here too) before you can use a TetherSpout.

When you eventually purchase your retainer, you will actually have to order a set composed of a round retainer and two oval ones. Here are two oval ones:
Just use your imagination for the round one. I could not put it in the picture because it is... hmm... locked away.
Each of the retainers in such a set can pass through the same opening, since they all have the same width. Personally, I don't use the oval ones because I find them more complicated to remove (you have to line them up so that their width and not their length is what passes through your urethral opening and that's not trivial).

Regarding spout sizes:
All the spouts have the same diameter (it matches the size of the hole in all the retainers). When you buy spouts, you can opt to get a set of 4 different lengths, which is slightly cheaper than if you were to buy all 4 separately. My advice is to just get two of the longest (24mm) spouts. For chastity purposes, the shorter ones are not that useful. If you do buy a set of 4, you'll probably end up wearing only the longest one and you'll use the next-to-longest only to help insertions/removals.


Remember to sanitize your sound(s) and the tip of your penis thoroughly before insertion (e.g.with antibacterial soap). Especially as you'll probably push the sound in further than any spout. It is also a good idea to urinate after you are done to flush out any possible impurities.

PS: I'm not sorry for the possibly misleading title. I like double-entendre.  :-p

Monday, August 31, 2015

In the heat of the moment...

By "in the heat of the moment", I refer to those times when the keyholder wants the cage off, for instance for some impromptu Tease and Denial or even penetrative sex, but going through the TetherSpout removal procedure I outlined would just kill the mood...

But it is not necessary to remove the spout to have a good time. One just needs to prevent it from retracting too far inside where it could be painful and/or awkward to fish out. For that purpose, there are accessories like the two I own, bought from Tether Products:

 The circular barbell (8 Ga. 1" hoop):

Even easier to snap on, the spherical magnet. The one pictured here is 3/8" in diameter. 1/2" and 5/8" spheres are also available. The spout's stainless steel has magnetic permeability, so it will strongly stick to these neodymium nickel-plated magnets.
There are also ring magnets in the same material. I haven't tried those yet, but I have two on order...

Note that the hoop above leaves very little space for fluids to pass through the spout. In particular, that greatly restricts the passage of ejaculate so, for some, an orgasm with the barbell will be ruined, as if someone had pressed the meatus shut with a thumb or palm. Comparatively, the spherical magnets do leave the side holes free of obstruction, so fluid flow is less restricted. On the other hand, keeping the ball on while urinating could be messy!

Saturday, August 29, 2015

TetherSpout removal

This is a continuation of my previous post that described how to install a TetherSpout. Now we want to get that thing out of there:

Removal pretty much consists of reversing the installation steps, but there are a few subtleties...

As was the case for installation, this procedure uses a second spout, as well as dental floss and lubrication.

Pull the installed TetherSpout forward enough to access the cross holes. Thread a length of floss through those two holes, ending up with equal lengths on each side. Then, thread both floss ends through the bore of the second spout, entering by the tapered tip and exiting at the flange end.
Bring the two spout tips in contact and tension the floss to keep them that way. Bring the assembly out as much as possible. This will drive the retainer as close to the penis tip as it can go. Also, make sure the main spout's side holes (through which the floss is passing) are vertical (one at the top, one at the bottom). This will be optimal in the end, when the retainer is being pushed out, as it will minimize the retainer's tendency to flip out of alignment.

Lubricate the second spout a bit. While lightly holding the glans between two fingers to prevent the retainer from sliding backwards (but not hindering the movements of the spouts), gently push the second spout in, while maintaining tension on the floss. This will cause the first spout to start sliding further in, through the retainer:

Push the second spout all the way until its flange contacts the penis tip.

If you have held the retainer in place, it should now be clear of the first spout. Now release tension on the floss and pull the second spout out. With a bit of extra side to side finger pressure, you will feel the retainer flip and align itself flat between your fingers in the vertical plane.

While maintaining light finger pressure on the sides to prevent the retainer from pivoting back, yet not preventing forward sliding, pull gently on the floss to bring the spout out. It will push the retainer out ahead of itself. There may be a slight resistance as the midsection of the retainer passes through the inelastic part of the urethra but, once past that, the retainer will squeeze out. Continue the pull to bring the spout out and you are done!

Friday, August 28, 2015

TetherSpout installation

At the beginning, it used to take me a while to get my TetherSpout in place or remove it. Nowadays, I have worked out a procedure that allows me to get it in (or out) easily, in under 2 minutes...

To perform the TetherSpout installation, I use, of course, the spout and retainer, but also a second spout. I also need some fine string and some lubricant...

For the string, I use OralB Glide dental floss. Personally, I think is is terrible for flossing because it is so slick that it doesn't entrain food or plaque worth a damn. But for our purpose here its thin tape shape and its slickness make it perfect.

Now for lubrication... Stainless steel is smooth, but it does not slide well against semi-dry mucous membranes like the wall of the urethra. I have seen suggestions to urinate just before performing urethral insertions, as a way to provide lubrication. I don't recommend it, for two reasons:
  • Unless the insertion is performed while urine is flowing, the lubrication is not that great.
  • I prefer to preserve the capability to urinate after the insertion, as a way to flush out the piping. In particular, if a water soluble lubricant was used, that will get rid of any excess.
My current favorite for lubrication is an almost liquid Aloe Vera "gel" made by Earth's Daughter. I found it on Amazon. 99%+ pure Aloe Vera gels have the advantage that they do not leave behind long term sticky residue as they are readily absorbed by skin or mucosa.

Ok, I'm done with the product plugs, let's get on with the process...

First, clean your hands, the two spouts, and the retainer thoroughly with antibacterial soap (you should also clean the tip of your penis). You won't be pushing stuff into the urethra much further than a piercing would go, but when dealing with this area you want to be as aseptic as reasonably possible.

Cut a  length of the dental floss (about 10 inches or 25cm will do fine) and thread it through the cross holes of the spout, so there are equal lengths on each side. Then, apply a dab of lubricant to the flange of the spout and push it gently up the urethra until only the very tip sticks out (with the floss now hanging from it). You may feel a slight resistance at the beginning as the flange goes past the inelastic ring within the penis tip, but it should go through without discomfort.

Now, thread both ends of the floss through the bore of the second spout, starting from the tapered tip (not the flange side), so that you can bring the two spouts tip to tip. Apply a dab of lubricant to the second spout and, while tensing the floss to keep both spout tips in contact, push the second spout in, until its flange comes to rest on the tip of the penis. This will cause to first spout to go deep enough in to make space for the upcoming insertion of the retainer.

Now let go of the floss and gently pull out the second spout, leaving the first in place. Pull the second spout completely off the floss and set it aside on a clean surface. Make sure you do not pull the floss off the first spout!
Now, thread both ends of the floss through the retainer. Bring the retainer to the tip of the penis, align it with the vertical slit, apply some lube and push it in. There will be more resistance than with the spout (assuming you have the proper size retainer. Selection of that will be the subject of a future post). You will need to hold the glans between two fingers, one on each side, not top and bottom. Once half the retainer goes past the urethra's inelastic part, it will literally get sucked in:


Now, thread both ends of the floss through the second spout's bore, the same way as before. Apply a bit of lube if need be and gently push the tip of the second spout in.
At this point, you should no longer apply any pressure on the side of the glans as that would prevent the retainer from rotating into position. Tension the floss gently so the first spout starts heading back out as you continue slowly pushing the second one in. This will cause the retainer to rotate along the vertical and align itself so that the two spouts' tips make contact through the retainer:
 Once you feel, through the side of the penis, that the retainer has rotated into position, pull gently on the floss and bring the spouts out, keeping their tips together (this makes it easier on your urethra lining than dragging one spout tip out by itself). You will feel the spout sliding metal against metal inside the retainer.

Once the tip of the first spout peeks out the tip of the penis, you can remove the second spout and the floss. You are done:

Now, as I mentioned before, it is a good time to flush the plumbing by urinating. You will note that the flow of urine out the tip of the spout is quite smooth (in particular, it does not spray out the side holes).